
Getting Started
1. Install the app
Install Easy 3D Viewer from the Shopify App Store and approve the permissions. The app opens on the Dashboard, which shows a Getting started card that tracks the steps below and marks each one done as you finish it.
You start on the Free plan, which covers 3 models and 3 products. Upgrade any time from Pricing.
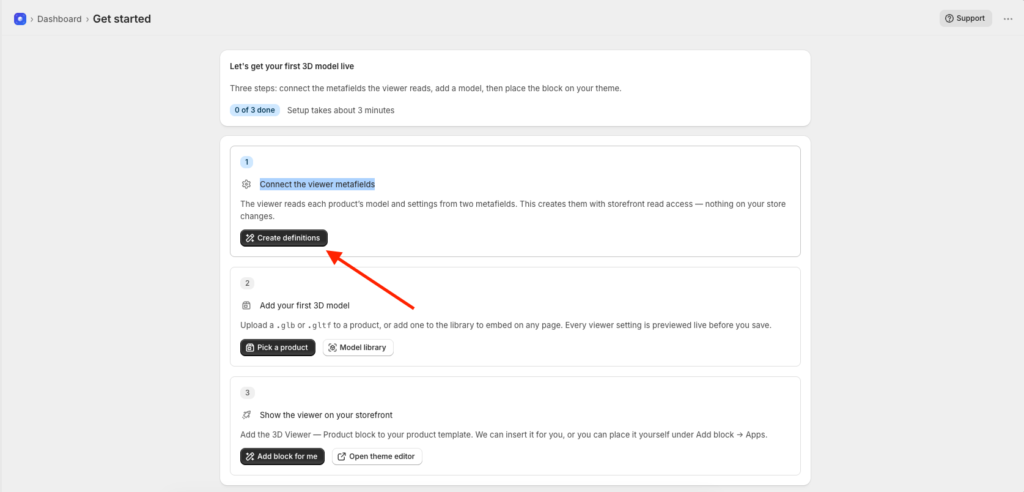
2. Connect the viewer metafields
Click on the Create Definations button and Create Definations for viewer connect to Prodcut metafields.
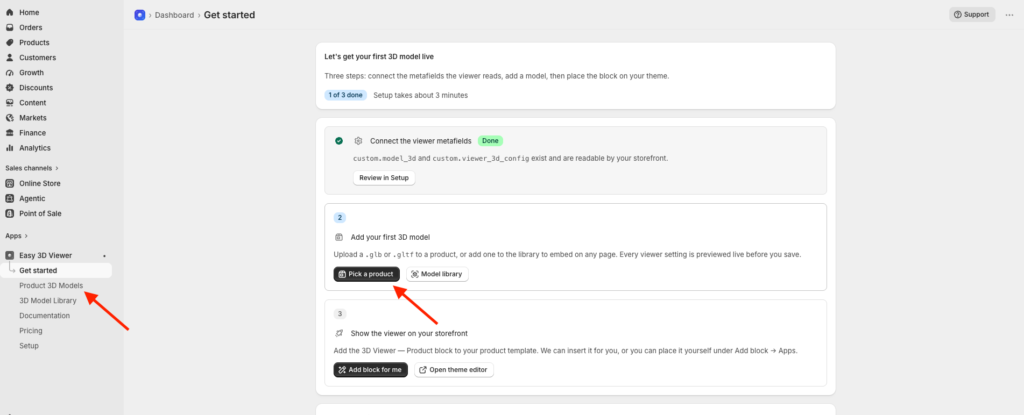
4. Upload your first model
For a product, open Product 3D models, click a product, and upload its .glb file. For anything else, open 3D Models, add the model there, and copy its Model ID into the Any Model block.
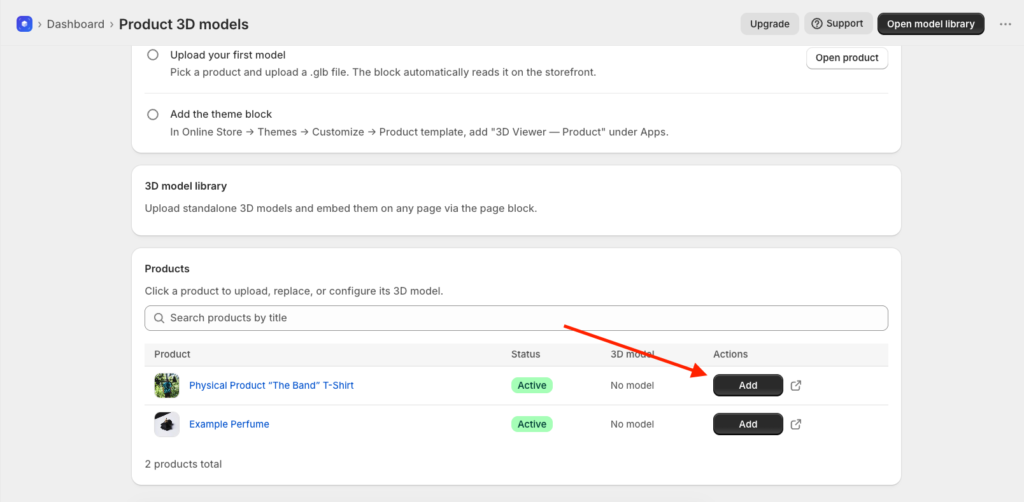
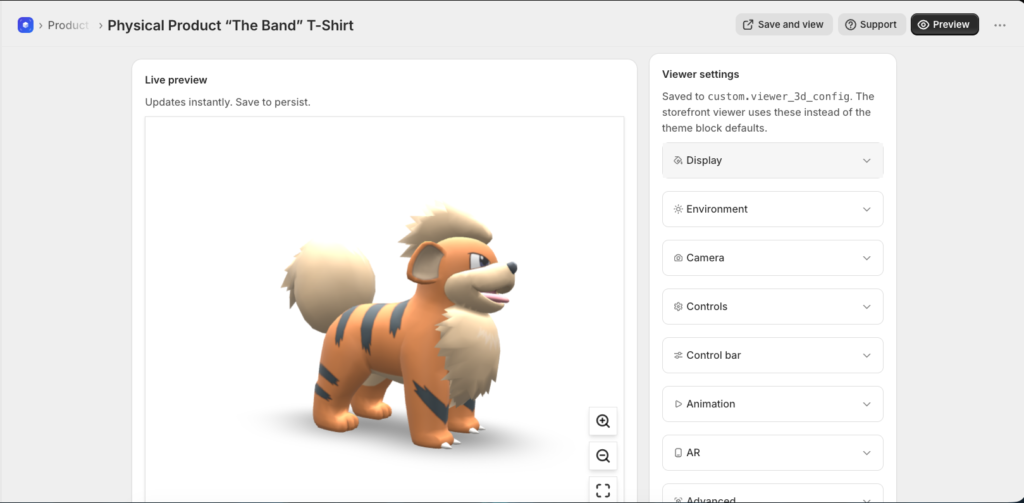
Adjust background, lighting, camera, animation and AR settings in the same screen. The preview updates as you change them. Save, then open the storefront page to confirm.
File requirements
Use .glb, the single file binary glTF format. .gltf also works. Files up to 20 MB are accepted. Keep them under about 10 MB for the fastest page loads.
3. Add the theme block
Go to Online Store > Themes > Customize.
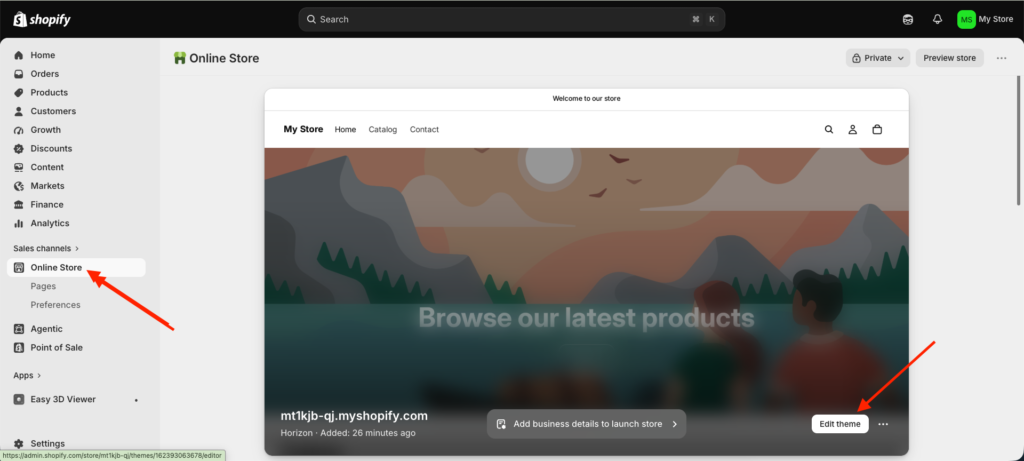
For product pages, switch to the Product template, click Add section, scroll to Apps, and add 3D Viewer > Product. It reads the model from the product automatically.
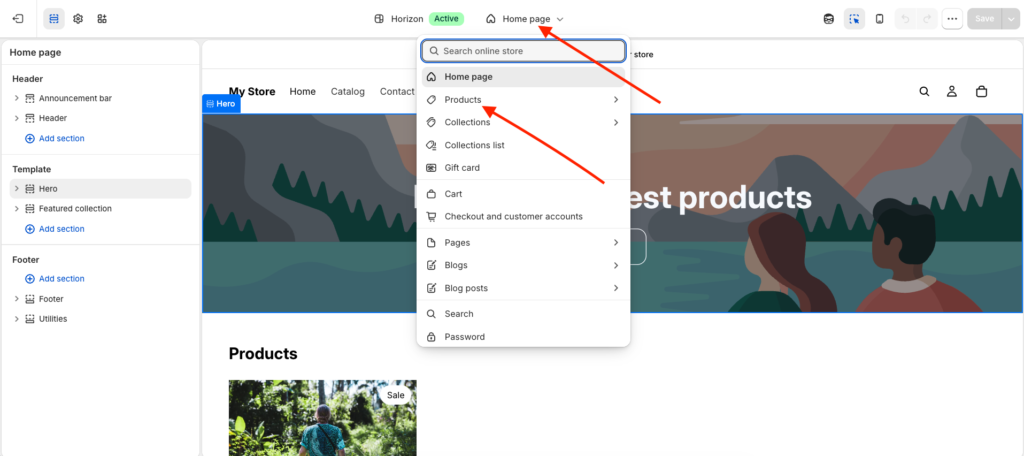
For any other page, such as home, a blog post, or a custom page, choose that template from the dropdown at the top of the editor, then Add section > Apps > 3D Viewer > Any Model, and paste in a Model ID.
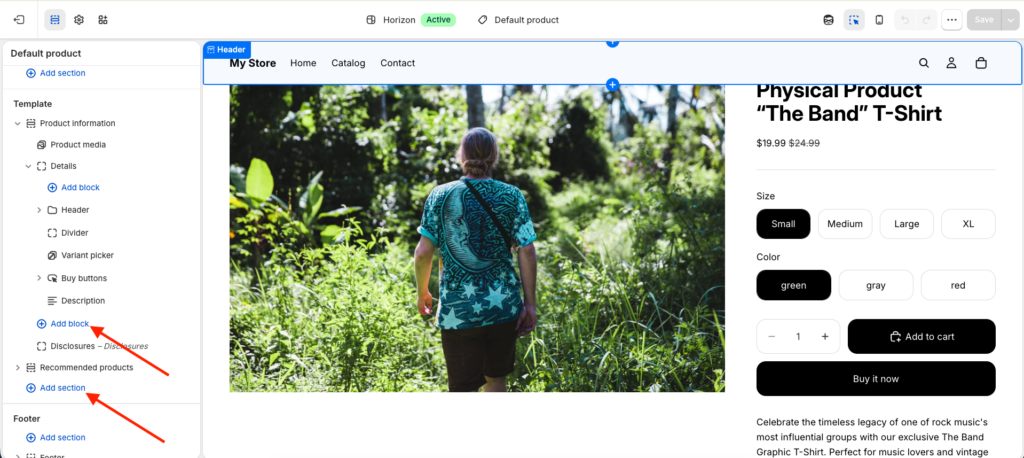
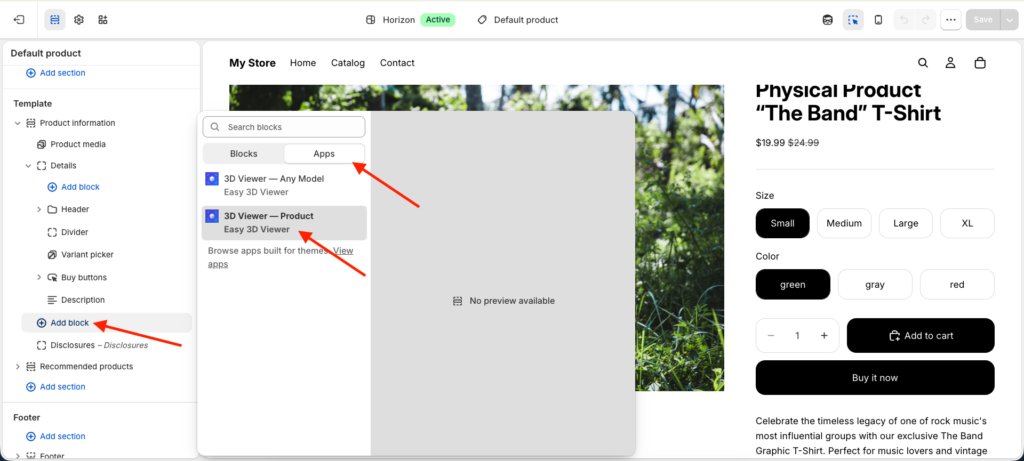
Save the theme.
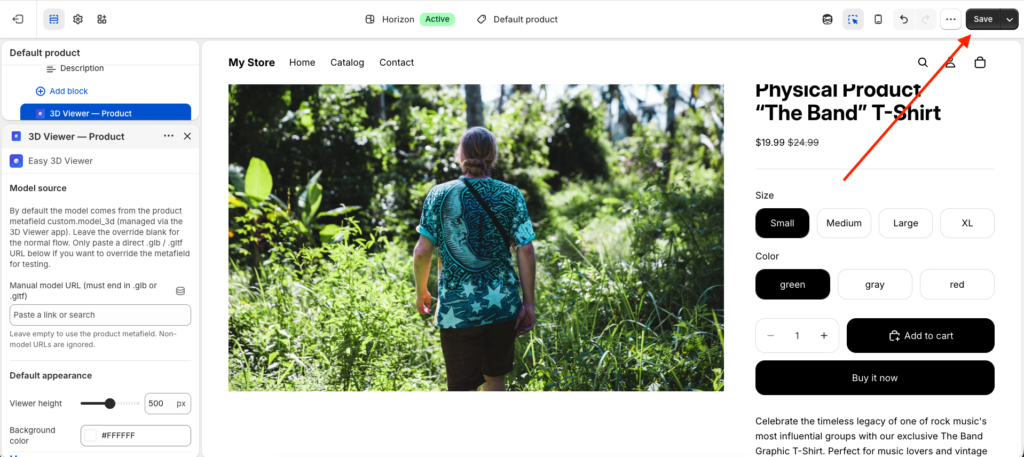
If Apps is missing from the Add section list
App blocks only exist in Online Store 2.0 themes. On a legacy .liquid template, use the iframe embed code from the model’s page instead.
Was this page helpful?